
Contact Dayton Door Sales Today!
Thank you! Your submission has been received!
Oops! Something went wrong while submitting the form.

Your garage door is one of the largest moving objects in your home. A typical sectional door weighs between 150 and 300 pounds, and without proper safety measures, it can cause serious injuries. That’s where photo eye sensors come in; these small devices are designed to detect objects in the door’s path and stop or reverse the door before anyone gets hurt.
Since the early 1990s, U.S. automatic openers have been required to include working safety sensors to meet federal standards (UL 325). This wasn’t an arbitrary rule; it came after reports of injuries and fatalities, particularly involving children. When your sensors aren’t functioning correctly, that heavy door becomes a serious hazard, not just an inconvenience. In this blog, we’ll walk through five clear signs your garage door sensors aren’t working and explain what steps you can take to get things back to safe operation.
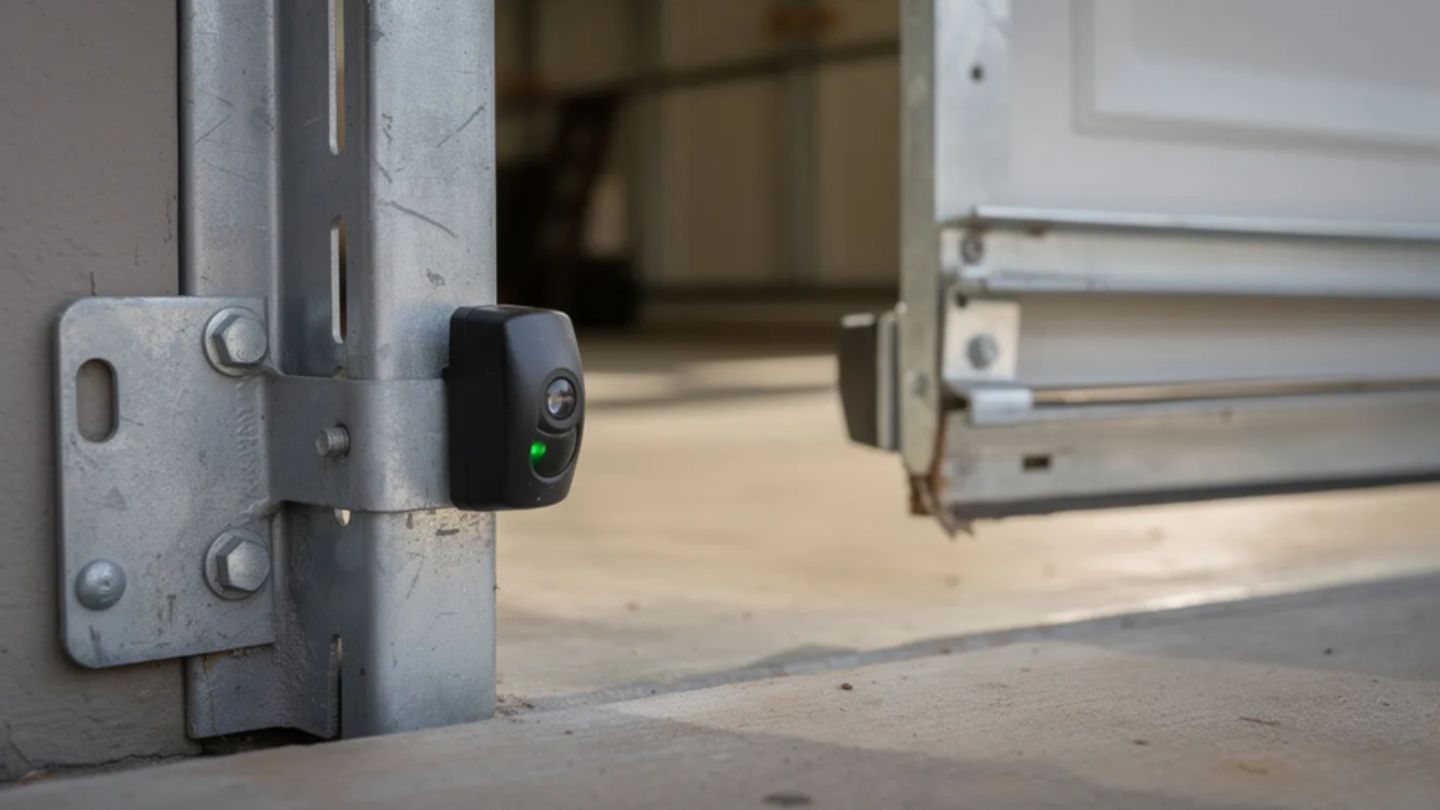
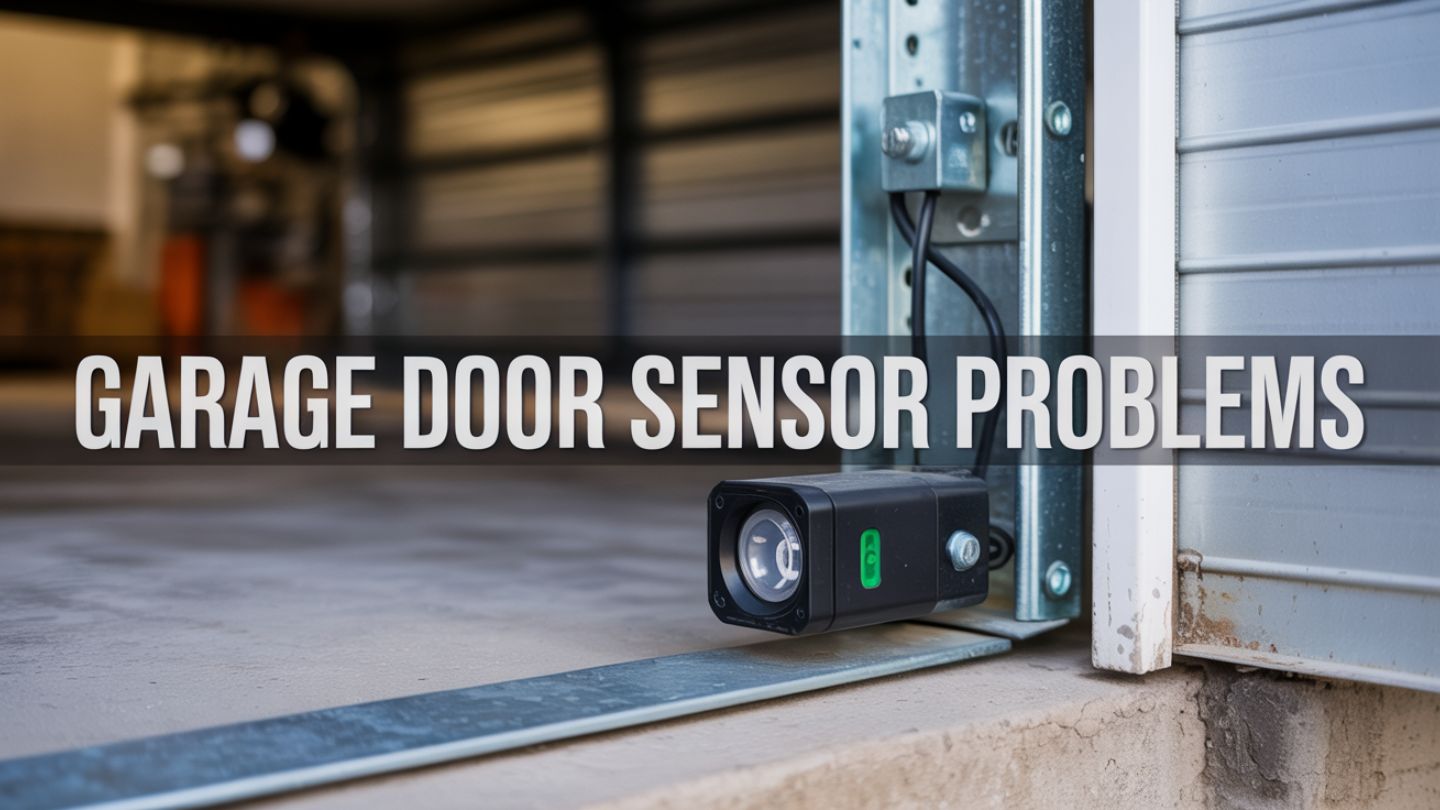
Most homes with automatic garage door openers use what’s called a photo eye system. These are two sensors mounted about 4 to 6 inches above the floor on opposite sides of the door track. One sensor sends an invisible infrared beam across the opening, and the other receives it. When that beam is intact, the opener knows the path is clear and allows the door to close.
Each sensor typically has a small LED indicator light. On many systems, you’ll see a green light on the sending unit and an amber or red light on the receiving unit. These LED lights tell you at a glance whether the sensors have power and are properly aligned. Sensor performance is also closely tied to opener condition, which is why understanding how long garage door openers last can help homeowners spot when aging equipment may start affecting safety systems.
Here’s the practical takeaway: anything that disrupts that signal, obvious dirt on the lenses, sensor alignment issues, broken wires, or even direct sunlight interference, can make it seem like your sensors aren’t working properly.
Picture this: you press your remote, the garage door starts moving down, gets about a foot from the ground, and suddenly shoots back up. You look around, nothing’s in the way. You try again, same result. This is one of the most common signs that your garage door sensors have a problem.
When your garage door opener detects that the infrared beam between the two sensors is blocked or missing, it defaults to “safe mode.” The opener is designed to reopen the door whenever it thinks something might be in the path. This is exactly what you want when a child or pet wanders under a closing door, but it’s frustrating when nothing’s actually there.
A door that opens fine but won’t close from the remote, keypad, or your car’s HomeLink is a classic sensor-related symptom. Issues like this are frequently covered when homeowners look into garage door repairs and what to do to fix common problems, since sensors are among the first systems to fail when something is out of alignment.
Try the cardboard box test: Place a medium-sized cardboard box in the sensor path and press your remote to close the door. A working system should stop and reverse before touching the box. If the door crushes or drags the box, your sensors are either misaligned, disconnected, or not being detected by the opener’s logic board, and that’s a clear sign something needs attention.
Most modern sensors use LED indicator lights as a built-in status check. Taking a moment to look closely at both sensors can tell you a lot about what’s happening with your garage door system.
Here’s a quick reference for what those lights typically mean:
|
Light Status |
What It Usually Means |
|
Solid lights on both sensors |
Properly aligned, receiving power. |
|
Blinking light on one side |
Misalignment or vibration issues |
|
Dim or flickering light |
Marginal alignment or dirty lens |
|
Both lights are completely off. |
Power or wiring problem |
If both sensor lights are off, there’s likely a power supply issue between the opener head unit and the sensor terminals. This could be as simple as a loose wire connection or as serious as a problem with the opener’s logic board. In situations like these, homeowners often wonder whether repairs are worth the cost, which is why it helps to understand whether homeowners' insurance covers garage door repairs when damage is caused by accidents, storms, or external factors.
Here’s a quick test: gently hold one sensor and slowly adjust its angle. If the blinking green light turns solid when you find the right position, you’ve confirmed an alignment issue. Tighten the mounting screws once both indicators stay lit, and you may have solved the problem.
Your door sensors sit just a few inches off the garage floor, right where they’re constantly exposed to dust, grass clippings, road salt, and spider webs. Over time, this grime builds up on the sensor lenses and can weaken or completely block the infrared beam.
Common culprits include:
Even a thin film can reduce the beam intensity enough that the receiver thinks the path is blocked. This leads to the same frustrating behavior: a garage door refusing to close or reversing unexpectedly.
The fix is often a simple cleaning. Use a soft cloth, dry or slightly damp, to gently wipe both sensor lenses. Avoid glass cleaner or harsh chemicals, as these can haze the plastic housing and make the problem worse over time.
In areas with sprinklers, coastal humidity, or frequent temperature swings, moisture can even get inside the sensor housing and cause intermittent failures. If you notice water droplets or fogging behind the lens, that sensor may need replacement rather than just cleaning.
After cleaning, re-test the door using your remote and the cardboard box test. If behavior improves immediately, you’ve likely found your culprit, and a monthly wipe-down will help prevent the issue from coming back.
Photo eye sensors are mounted in high-traffic areas of your garage. Bikes get wheeled past them. Lawn tools lean against the wall nearby. Kids drag toys through the space. Trash cans get pulled past the garage door tracks. Even a small bump can knock a sensor out of alignment.
Take a moment to visually check that both sensor “eyes” are pointed directly at each other. They should be:
When sensors aren’t at the same height or aren’t aimed precisely at each other, the infrared beam can’t make a reliable connection. Even a slight twist or tilt can make one sensor’s LED blink or go out whenever the door vibrates during movement.
Look for physical damage signs as well: cracked housings, bent metal brackets, sensors dangling from their wires, or visible impact marks. These are clear indicator lights that something’s wrong beyond simple adjustment.
If the sensor won’t stay aligned, maybe the bracket won’t tighten properly or is bent from an impact, a garage door sensor replacement is usually the better path forward. Repeated adjustments without proper repair are a common example of why the dangers of DIY garage door repair shouldn’t be underestimated.
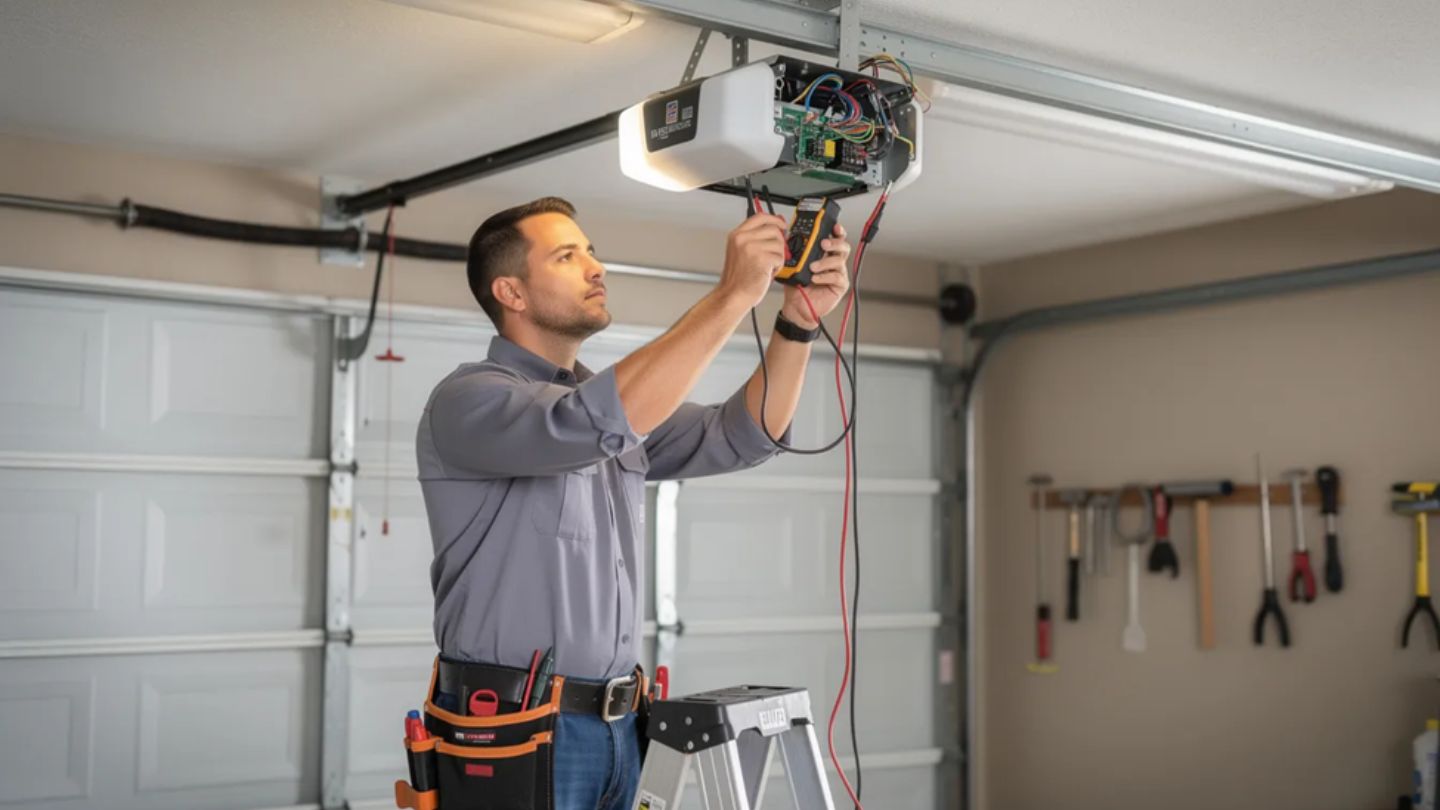
When the door still misbehaves after cleaning and aligning, the root cause is often electrical. No power to sensors, damaged low-voltage wires, or a bad connection at the opener can all prevent your safety mechanism from functioning correctly.
Start with a visual inspection. Follow the sensor wires from each unit along the wall and ceiling up to the opener. Look for:
Both LEDs being off typically points to a loss of power. This could be from an unplugged opener, a tripped GFCI outlet (common in garages), or loose terminals on the opener’s sensor screw posts.
Important safety note: Do not work on live wiring. If you need to inspect connections at the opener, shut off power at the breaker first. Never touch exposed conductors with the power on.
Call a professional service technician if you find evidence of burnt insulation, corroded connectors, or if restoring power doesn’t bring the sensor lights back. Electrical issues in the opener or wiring often require proper tools and testing equipment to diagnose safely.
Before running any tests, make sure all people, children, and pets are well clear of the moving door. A garage door that’s not functioning properly can behave unpredictably, and safety always comes first.
Step-by-step sensor test:
A healthy system will either refuse to let the door close at all, or it will start down and immediately reverse as soon as the beam is blocked. The opener's lights may flash to indicate that it has detected an obstruction.
The “hold the wall button” observation: If your door only closes when you keep the interior wall button pressed down continuously, the opener is deliberately bypassing the safety sensors. This constant-pressure mode exists as an emergency override; it lets you close the door while you’re physically watching it.
Do not use this override as an everyday workaround. It disables the photo eye protection entirely and significantly increases injury risk. Use it only as a diagnostic step to confirm that your sensors are the problem, then address the underlying issue.
Professional technicians have tools to test voltage at the opener terminals, properly rerun low-voltage sensor wires, and install replacement sensors so the system meets current safety standards. They can also perform a full safety check of springs, cables, and opener force settings, similar to the standards followed in commercial garage door repair services, and their benefits, where safety and reliability are non-negotiable due to higher daily usage.
A few minutes of maintenance every month or two can dramatically reduce sensor-related breakdowns and ensure safety for your family and property.
Monthly habits:
Seasonal checks:
Year-round best practices:
Scheduling a professional garage door tune-up about once a year helps catch subtle issues with sensors, cables, and opener sensitivity before they fail completely. It’s a small investment that keeps your garage door functioning properly and prevents unexpected breakdowns.
Garage door sensor problems often start small, but ignoring them can quickly turn a minor inconvenience into a serious safety risk. From doors that won’t close to blinking sensor lights and damaged wiring, these warning signs are your system’s way of telling you something isn’t right. Regular inspections, proper cleaning, and knowing when to stop DIY troubleshooting all play a key role in keeping your garage door operating safely and reliably.
When sensor issues go beyond simple adjustments, Dayton Door Sales provides trusted solutions for homeowners who need dependable services, garage door repair in Springboro, as well as support across nearby communities. Whether you’re in Kettering, OH, Tipp City, OH, or Bellbrook, OH, our technicians are equipped to diagnose and fix sensor issues quickly and professionally. We also serve homeowners looking to upgrade or repair their patio entry doors in Troy, OH, and Kettering, OH, ensuring seamless operation and long-lasting performance throughout your home.
No, permanent bypassing is unsafe and typically violates safety standards and manufacturer instructions. The override on the wall button is designed for testing and emergencies only, not everyday use. The correct solution is always to repair or replace the sensors so your safe operation system works as intended.
Most sensors last between 8 and 15 years, depending on your climate, UV exposure, and whether they’ve taken physical impacts. Signs that replacement is overdue include repeated false trips, water damage visible in the housing, dead LEDs that don’t respond to troubleshooting steps, or a faulty garage door sensor that can’t hold alignment.
Because infrared sensors are sold and calibrated as pairs, most manufacturers recommend replacing both at the same time. This ensures compatibility and reliable operation. Mixing an old sensor with a new one can lead to alignment issues and inconsistent performance.
Yes, strong low-angle sunlight can temporarily “blind” the receiving sensor, especially in the morning or late afternoon when the sun shines directly into your garage opening. Heavy rain, snow, or condensation can also scatter the beam and cause intermittent failures. Solutions include slight sensor repositioning, installing a sun shield, or calling a pro if sunlight interference happens regularly at certain times of day.